|
|
|

From time to time you should delete obsolete files from your backup (or any other
directory). Personal Backup offers the Cleanup function to perform this task
automatically depending on file types and/or file age. Make sure that all files you plan to
delete no longer exist in the source directory, otherwise they will be copied
again during the next backup.
In addition, it is possible to delete files manually using any file manager of your choice.
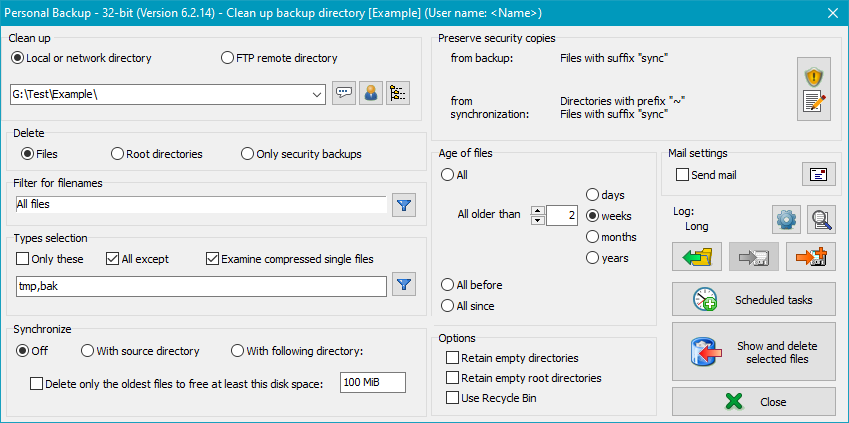
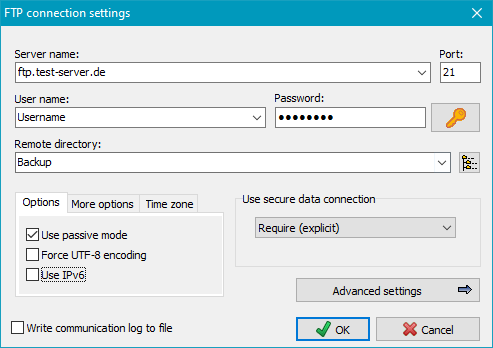
The directory from which you wish to delete files may be located on a local storage medium, on a Windows network drive or on a directory on an FTP server. Subdirectories are included automatically. By default, all files including any compressed (.gz) and encrypted (.enc) files will be deleted.
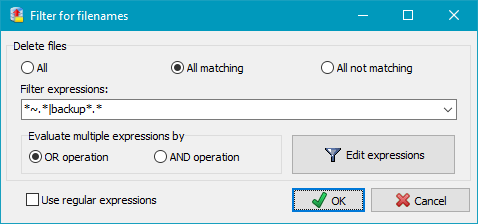
Using these filters will include or exclude filenames or directories matching certain
conditions. The same rules are used as described for backup file filters
(Standard file filter
or Regular expressions).
Clicking the ![]() button will open a dialog to edit the list of filters to be applied:
button will open a dialog to edit the list of filters to be applied:
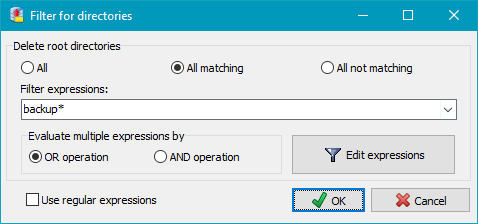
You can specify whether you want to delete only files or directories older or newer than a given fixed or relative date.
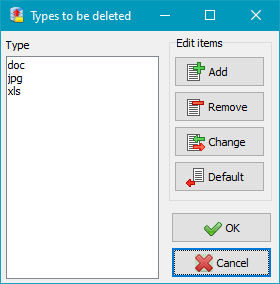
The cleanup may be confined to selected types of files (filename extensions).
You can select whether only the selected types or all but the selected types
will be deleted. Clicking the ![]() button will open a dialog to edit the list of filters for file extensions. Extensions
are specified without wildcards and dot.
button will open a dialog to edit the list of filters for file extensions. Extensions
are specified without wildcards and dot.
If the backup was made into single compressed files, enable this option to
remove the additional extensions .gz/gze or zip in the file
selection list (default setting: enabled).

This option is only available when deleting files. You can synchronize the backup directory with a source directory. All files not present at the source will be deleted from the backup directory. Additional restrictions can be made by means of selections concerning file types and age as described above. Possible settings are:
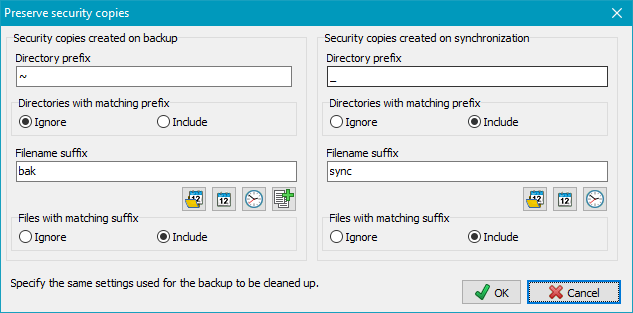
If security copies were created during backup these files can be handled separately:
To facilitate this setting, you can click the very left button at the bottom to import the settings from the corresponding backup task. In both cases, you can select whether to handle only security copies from backup, from synchronization or both:

Check this option in case you wish permanently to delete security copies (files and
directories) created during a backup when this dates back beyond a certain time
(e.g. 6 months previously). To do this, on
creating the security copies it is
necessary to insert the placeholder for the backup date at the end of the suffixes
for files and/or directories. This date is being simultaneously the creation date
of the security copies. During cleanup this date will be checked and, if older than
the given date, the affected files and/or directories will be deleted.
All other security copies and of course all normal files will be retained.
Entries for the directory prefixes are not required in this case, only filename
suffixes must be specified in the settings (see above). Bear in mind that
you must insert exactly the same value as has been used for backup.
In addition you can select on which type of security copy (previous versions or on
synchronization deleted versions) the deletion will be applied.
Retain empty directories - If this option is selected, empty directories remaining after deleting the selected files are not deleted, so that the complete directory structure is preserved. Otherwise, all empty subdirectories and, if also empty, the root directory (see also the following option) are also deleted.
Retain empty root directories - If the previous option is not selected, this can be used to specify that after deleting the selected files and subdirectories, an empty root directory will be retained.
Deleted files to recycle bin - files will not be irrecoverably
deleted but moved to the Windows recycle bin so that you can recover them if needed. This
function is not available with a network drive or FTP directory. Please note,
that it is not possible to delete files with long path lengths
(more than 260 characters) with this option.
As with backups, a mail with status information and optionally a log file can be sent
after performing a cleanup task. The settings
are the same as for backups.
Clicking the ![]() button will open a dialog to adjust
the log settings for the cleanup task.
button will open a dialog to adjust
the log settings for the cleanup task.
Click then ![]() button to view the current log.
button to view the current log.
Clicking the ![]() or
or ![]() button will save a configured cleanup task with all settings to disk.
To load and reuse such a saved task, click the
button will save a configured cleanup task with all settings to disk.
To load and reuse such a saved task, click the
![]() button.
button.
A saved cleanup task can also be started from the command line. It is therefore possible to use the Windows Task Scheduler function, for example, to remove old files from your backup periodically.
You can configure a Windows scheduled task to carry out an automatic Cleanup
by clicking the ![]() button. The configuration procedure is the same as described for backups.
button. The configuration procedure is the same as described for backups.

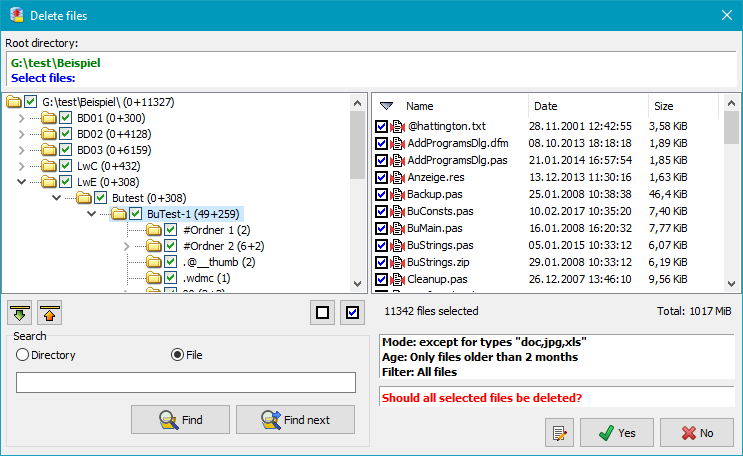
Clicking the button will start the cleanup. Before deleting any files, the program will create and display a list of all files that match the filter conditions. If the selection is incorrect, you can cancel the cleanup at this point and adjust your settings. It is also possible to select or deselect individual files or directories by tagging the checkboxes.
A right-click on a file opens a menu for further control. The selections required
for an external file viewer and a file comparison program can be made by clicking the
![]() button:
button:
