


Other backup options
Click the Other options tab to configure the advanced settings for your backup
task:

If one of the Synchronize options is selected (only available in Update mode),
source and destination (including all subdirectories) are compared
and all files and directories that do not exist (or no longer exist) at the source will be deleted
from the backup directory. This ensures that you will have an identical copy of the
source at the backup destination.
Synchronizing will not work with zip files at the destination, nor with the option
One directory without full path if more than one source directory is selected
for backing up.
- Off
- No files will be deleted from the destination directory or directories.
- All files
- All files that no longer exist at the source will be deleted from the destination.
Any folders and files excluded from the backup will be also deleted.
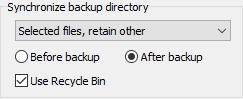
- Selected files, retain other
- Only the files and directories that were selected for backup
(see selection of subdirectories, files and types)
will be synchronized.
All files which are not from this selection will remain untouched.
- Selected files, delete other
- Only the files and directories that were selected for backup
(see selection of subdirectories, files and types)
will be synchronized.
All files which are not from this selection will be deleted
(irrespective of their existence at source).
The synchronization can be done alternatively before or
after backing up the files. The second option is recommended
because in this case the synchronization will not be started if the backup was canceled.
Important note: Bear in mind that if synchronizing is selected, all files deleted from the source
in error by the user will also be removed from the destination on next backing up.
To avoid this, you can select one of the following options:
- Use Recycle Bin: During synchronization files will not be
irrecoverably deleted but moved to the Windows Recycle Bin so that you can recover
them if needed. This option is only available if the destination is on a
local fixed drive. Notice that this function is only available for files with
paths not longer than 260 characters.
- Security backup on synchronization: All files missing
from the source will not be deleted from the destination but renamed
to <name>.sync.<ext> or moved to a subdirectory instead.
So they can be restored if desired.
This option is available also with backups on removable drives (USB), network
drives and backups via FTP.
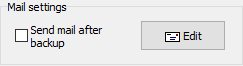
For monitoring the backup process on a remote computer, the administrator can
arrange for a report to be sent by mail. The backup log can be attached
(optionally as a zip file). If errors occurred during backup, the mail priority
will be set to high (normal otherwise).
 Required settings:
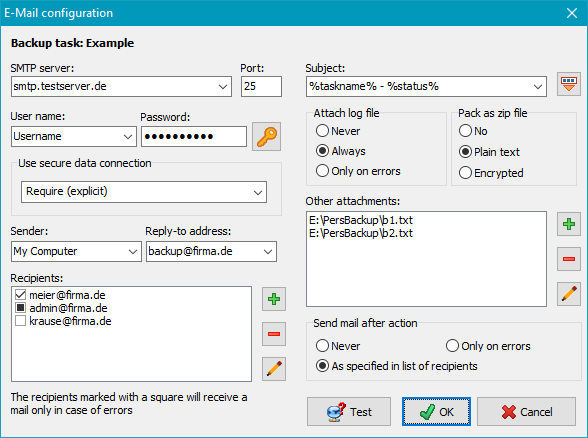
- SMTP server: URL of the SMTP server
- Port: Port number of the SMTP server (default: 25)
- Username: Name of the user account on the SMTP server (if required)
- Password: Click the button at the right to enter the password for this account
- Use secure connection: You can select whether the mail is to be
delivered using a secure connection (TLS/SSL):
- None: Logon and mail data will be transferred in plain text
- If available (explicit): Before logon, a STARTTLS will be
sent. If the server supports secure connections, this will then be used.
If not, data will be transferred in the normal way (explicit method).
- Require (explicit): Before logon, a STARTTLS will be
sent. If the server supports secure connections, this will then be used.
If not, the connection will fail (explicit method).
- Always (implicit): A secure connection will be used on Port 465.
If the server does not support this mode, then connection will fail
(implicit method).
- Sender: Mail address of the sender or any other text (in this
case, a reply-to address is required).
- Reply-To address: Address for replying to the mail (this field can be
left empty if a valid mail address is given for Sender)
- Recipients: The field contains a list of the addresses of all persons
who are to receive the report. An address may contain the placeholder %username%
which will be replaced by the name of the logged-on user on mail delivery.
Use the buttons on the right to add, remove or edit the entries.
By checking the boxes to the left of the addresses, you can select one of the following options:
- Hook: This recipient will receive always a mail.
- Square: This recipient (e.g. an administrator) will receive
a mail only if errors occurred during the action performed.
- none: This recipient will temporarily not receive a mail.
- Subject: You can insert a brief text that is to be displayed in
the recipient's subject field. Click the
 button to insert
placeholders into the text (see screenshot below):
button to insert
placeholders into the text (see screenshot below):
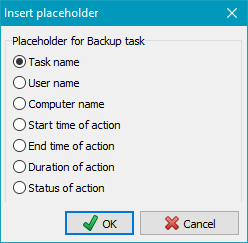
- %taskname% - Name of the backup task
- %username% - Name of the logged-on user
- %computername% - Name of the computer on which Personal Backup is installed
- %start% - Date and time when the backup started
- %end% - Date and time when the backup ended
- %duration% - Duration of backup in hours:minutes:seconds
- %status% - Status of backup (number of files copied, number
of errors, etc.)
If nothing is specified in this field, the subject will be set to default:
Personal Backup: Backup on <Date> <Time>.
- Attach log file: Optionally you can add the log file of the backup
just performed either always or only if errors occurred as an attachment to the mail.
The name of the attachment is assembled from a prefix (default: PB) and
the date and time when the backup was started. The prefix
can be edited by the user
to help distinguishing between logs from different sources.
- Pack as zip file: If a long or a verbose log was created, packing it as zip
file is recommended. Optionally, the log can be encrypted. The password to be
used is automatically requested when this option is selected.
- Other attachments: If desired, up to 10 additional files can be attached
to the mail. for example to send the status information of an external program.
- Send mail after action: Select whether a mail is to be sent always after
each backup to the recipients as specified in the list
(also Restore
Verify and Clean up),
or only if errors have occurred.
- Test: To test the settings, click this button. A test mail will be
sent to all selected recipients instantly. If errors occurred, it will be
displayed. For a detailed analysis you can view the SMTP communication log.
This log is written into the file PbSmtp.log located in the same directory
as the other log files (see here).
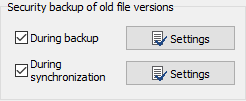
When backing up, older file versions at the destination can be preserved if one
of the following settings is selected:
When synchronizing, the backups of files that no longer exist on the source side can be preserved:
During Backup
If this box is checked, previous file versions at the destination will not be
overwritten but renamed and optionally moved into a separate directors.
but with a modified name. This name will be the original name with a suffix added
in front of the final extension. Depending on the backup destination selection
(Windows directory, FTP or Zip archive), some options described below may not be available.
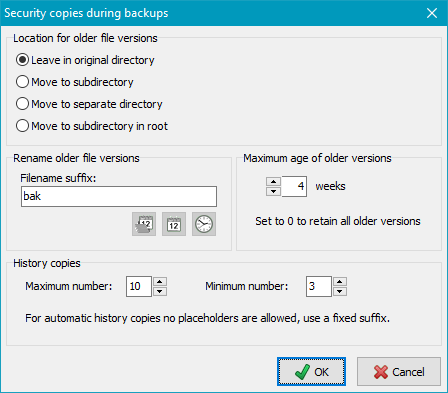
Location for older file versions
The security copies can be archived at different places:
- Leave in original directory: Older file versions are renamed as specified
(see below) and will remain at their former places.
- Move to subdirectory: In each directory a new subdirectory will be created.
Its name is assembled from a selectable prefix (as with synchronization)
and the fixed identifier bak (Default: ~bak).
All previous file versions
will be renamed using the method described below and will then be moved to this
directory during backup. If only one security copy is to be retained, it is possible
to omit the suffix. In this case the original filename will be used.
- Move to separate directory: In the destination directory of each directory
to be backed up a subdirectory will be created. Its name is assembled as described above.
Below this, an original directory tree will be created to hold the renamed security
copies (see above).
Note: This option is not available for backups using FTP.
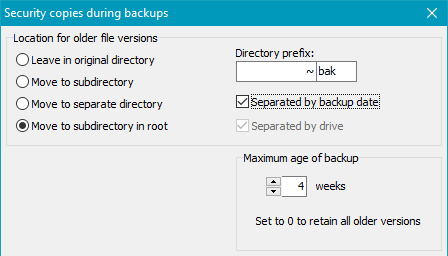
- Move to subdirectory in root: In the root directory of the backup
a subdirectory will be created. Its name is assembled as described above.
Below this, an original directory tree will be created to hold the optionally renamed
security copies (see below).
- Separated by drive: The subdirectory will be created in the root directory
of each drive. This option is only available if the backup method
Separate directories for drives is selected.
- Separated by backup date: The backup date is added to the name
of the subdirectory. Depending on the selected backup method (see above),
the subdirectory will be created in the root directory of the backup or in the root
directory of each drive.
In this case the security copies will retain their original names. That means
that during a backup a possibly existing previous file version will be moved
to the subdirectory the name of which includes the current backup date
(such as ~bak-2020-02-03). An option to rename these files as described
below is not available at this point. This method is also called
reverse incremental.
In addition, you can specify how long previous file versions should be retained (e.g. 4 weeks).
Older security copies will automatically be deleted on backup to prevent the storage
capacity at the destination from growing unduly.
Note: This option is not available for backups using FTP.
Rename older file versions
The new name is derived from the original name by adding a suffix left from the file
extension. The following examples will explain this. The options marked with
* are only available if the maximum number is set to zero.
- Fixed*:
<filename>.<suffix>.<ext>[.gz|.enc]
Only one security copy will be retained, this being the most-recent previous version.
A suffix (default: bak) will be inserted
into the filename.
- With timestamp of file*: (not available with FTP)
<filename>.2011-06-12-12-17.<ext>[.gz|.enc]
Click the left button to insert the appropriate placeholder;
A security copy of a previous version will be made during each backup, indicating
the date and time of its last modification
- With date of backup*:
<filename>.2011-06-12.<ext>[.gz|.enc]
Click the center button to insert the appropriate placeholder;
A security copy of a previous version will be made during each backup, indicating
the date it was backed up.
- With time of backup*:
<filename>.13-45-17.<ext>[.gz|.enc]
Click the right button to insert the appropriate placeholder;
A security copy of a previous version will be made during each backup, indicating
the time it was backed up. If a security copy made on another day at the same time
already exists, this will be overwritten.
- A certain number of previous versions:
<filename>.bak-1.<ext>[.gz|.enc],
<filename>.bak-2.<ext>[.gz|.enc], ...
Any number of the most recently-made security copies will be retained up to a selected
maximum. This option cannot be combined with the above placeholders for timestamp,
etc, use a fixed suffix instead. If a maximum age (see below) is selected,
you can additionally select a minimum number of older versions that shall be
retained in any case (even if they are older as specified).
Maximum age of older versions
Additionally, you can select how long the security copies shall be preserved.
Older files will be deleted automatically during backup. If the number of weeks
is set to 0, all security copies will be retained irrespective to their age.
Note: When synchronizing is enabled, previous versions
will be retained only for files still present at the source.

If this option is enabled, during synchronization all files and directories that no
longer exist at the source will either be renamed and/or moved to another directory
instead of being deleted from the destination. It will then be be possible to restore
files that were deleted from the source in error even after a backup with synchronization.
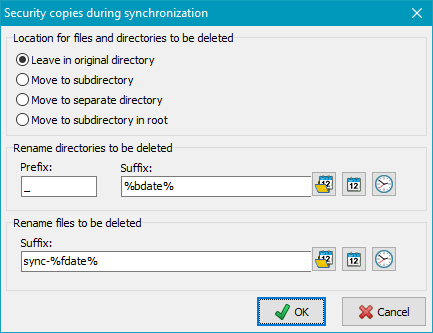
Location for files and directories to be deleted
The security copies can be archived at different places:
- Leave in original directory: All affected files and directories
are renamed as specified (see below) and will remain at their former places.
- Move to subdirectory: In each directory a new subdirectory will be created.
Its name is assembled from a selectable prefix
and the fixed identifier sync (Default: _sync).
Affected files
will be moved to this directory during backup and optionally renamed depending
on the settings for the suffix. It is possible to leave the suffix fields blank.
In this case the original filenames will be retained.
- Move to separate directory: In the destination directory of each directory
to be backed up a subdirectory will be created. Its name is assembled as described above.
Below this, an original directory tree will be created to hold the renamed security
copies (see above).
Note: This option is not available for backups using FTP.
- Move to subdirectory in root: In the root directory of the backup
a subdirectory will be created. Its name is assembled as described above.
Below this, an original directory tree will be created to hold the renamed security
copies (see below).
Additional option:
- Separated by drive: The subdirectory will be created in the root directory
of each drive. This option is only available if the backup method
Separate directories for drives is selected.
Notes: This option is not available for backups using FTP.
Security copies created in this way cannot be taken into account on restore.
Rename directories to be deleted
- With option Leave in original directory: The name of the affected
directory will be preceded with the prefix (default: _)
and optionally a suffix (see below) will be appended (image at top left).
- With option Move to another directory: A new directory will be created
at the places described above (default: _sync).
The affected directory
will be moved using an optional suffix (see below) to this place.
(image at top right)
The suffix may remain blank, may have a fixed value or may additionally contain
placeholders for the timestamp of the directory (not available with FTP),
the backup date and/or the backup time (refer to Security copies
at Backup).
Rename files to be deleted
- With option Leave in original directory: The affected files will
be renamed by inserting a suffix (refer to Security copies
at Backup) and will remain at their former places. The suffix may be fixed
(default: sync) or may contain
placeholders for the timestamp of the file
(not available with FTP), the backup date and/or the backup time (refer to
Security copies at Backup). There are two alternative methods of
inserting the suffix:
- The suffix will be inserted into the filename in front of
the final extension (<filename>.<suffix>.<ext>[.gz|.enc])
such that Windows file type association will remain unaffected.
Example: Using the suffix "sync" will change MyText.doc
into MyText.sync.doc
- Prefixing the suffix by + sign
will cause the suffix to be inserted after the filename extension
(<filename>.<ext>.<suffix>[.gz|.enc]). Be aware
that the Windows file type associations will no longer work in this case.
Example: Using the suffix "sync" will change MyText.doc
into MyText.doc.sync
- With option Move to another directory: Renaming is done as described above
but the suffix may be left blank. In this case the filename will not be changed
when moved.
On Restore, Verify and
Cleanup, there are special functions
to handle files and directories marked in this way.
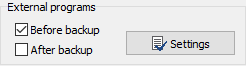
An external program, a batch file, a script or a shortcut can be executed before and/or after
each backup. This facility makes it possible during a backup to stop a currently-running
service or program that locks its files against access by other applications and
then to restart this afterwards (see this
sample script for backing up Outlook files), but many other operations may
also be realized in a similar way, such as waking up a server
(WakeOnLan).
Clicking the Settings button will open a dialog box (see screenshot on right)
where you can edit the required command lines.
Particular notes on executing scripts: Running batch files (.cmd and .bat),
VB scripts (.vbs) or PowerShell scripts (.ps1), will only require
the script file to be specified. Personal Backup will automatically start the
associated application. If the full path is not specified, the script file must be located
in the same directory as the backup tasks.
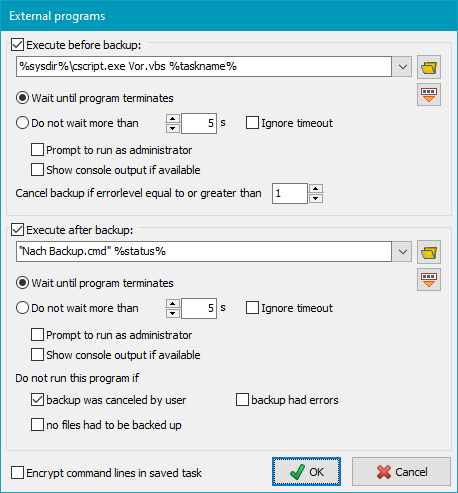
To activate the execution of an external program, first of all check the associated box
at the left. Clicking the
 button
will open a dialog to select a program, a script or a batch file and insert
its path into the command line. By clicking the
button one of the following placeholders can be inserted into the command line:
button
will open a dialog to select a program, a script or a batch file and insert
its path into the command line. By clicking the
button one of the following placeholders can be inserted into the command line:
- %taskname%: filename of the running backup task
- %dest%: destination directory from the task. If the path contains a
volume name
this will be translated into the current drive letter.
- %zipname%: name of the zip file (only available if selected as the destination).
- %sysdir%: path to the system directory (usually: C:\Windows\System32)
- %taskdir%: path to
task files
- %progpath%: path to the Personal Backup program installation folder
- %username%: name of the logged-on user
- %password%: password the user will be prompted for before starting
the external program.
- %logfile%: full path of log file (only available with external programs after backup)
- %status%: error code of preceding backup (only available with external programs after backup):
- 0 = no error
- 1 = backup task not found
- 2 = no access to destination directory
- 3 = source directory not found
- 4 = other error during backup
- 5 = backup was canceled by user
- %<xxx>%: all placeholders for date
(%date%,...,%year%), as they are allowed for destination directories,
or any
Windows environment variable (e.g. %TEMP%).
When starting the external program, the placeholders are replaced by the current
values. Bear in mind that with automatic backups, the command prompt will be displayed
after starting a batch file only when the option for the
status window is set to Wait for prompt
or Wait only on error.
Important notes: The application or script to be executed
must be specified with its full path (or the appropriate placeholder).
If there are spaces within its path, the
path must without fail be enclosed between quotation marks.
Other settings for external programs:
- Wait until program terminates: Personal Backup will wait until the
external application has terminated before it continues.
- Do not wait more than n s: Personal Backup will wait until the
external application has terminated, but not longer than the specified time
in seconds. A timeout will cause the backup not be started unless the option
Ignore timeout is enabled.
- Prompt to run as administrator: To execute some programs, higher
permissions than those of a standard user are required. If this option is
selected, Personal Backup will check if the user executing the backup has adequate
permission, e.g. that of an an administrator. If this is not the case, the dialog of the
Windows user access control will prompt for elevation.
- Show console output if available: If a console application or a batch file
is started as an external program, checking this option will display the output
of the program, normally shown in the command prompt, in a separate window.
This is for example useful for debugging batch files. VB scripts will be started
in interactive mode if this option is selected, otherwise in batch mode.
- Cancel backup if returned errorcode is equal to or greater than: An application
that has been executed before the backup may return an ExitCode greater than zero
(which can, for example, be evaluated in batch files using the command
ErrorLevel). The backup will be cancelled if this value is greater or equal than
the preset value (default = 1). Inside a batch script this value can be set
to n using the command EXIT /B n.
- Ignore returned errorcode: If an application that has been executed after the
backup returns an ExitCode greater than zero (see above),
this will not be displayed as an error.
- Do not run this program if ... : The program to be executed after
backup will not be started if at least one the selected conditions applies: the
backup was canceled by the user (default: on), there were errors during
backup (default: off) or no files had to be backed up (default: off).
- Encrypt command lines in saved task: If confidential information
(for example a password) is required to call the external application, you should
check this option. The information will then not be saved in plain text in the
backup task file.
Note: If you want to insert a pause after starting an external
application, for example to wait for an external drive to start up, you will need
to use a small batch script to call the program Wait from the program
utility package.
Examples: (<path> refers to the path of the specific program or script)
- 1. To check whether an external drive (e.g. a USB drive) is available and,
if applicable, powered up:
- Insert <path>\CheckDrive.exe %dest% /p
into then field "Execute before backup".
(download the program
CheckDrive).
- 2. To eject the disk after writing to a CD/DVD in drive D::
- Insert <path>\eject.exe D:
into the field Execute after backup
(download the program
the program EJECT by WebGeek, Inc. - dave@basicguru.com).
- 3. To delete a temporary folder before or after backup:
- Insert cmd.exe /c <path>\deldir.cmd <folder>
into the field. The batch file deldir.cmd should contain a line such as
del C:\temp.
- 4. To delete certain files before or after backup:
- Insert cmd.exe /c <path>\delfile.cmd <folder>\<mask>
into the field. The batch file delfile.cmd should contain a line such as
del C:\Temp\*.tmp.
- 5. To start a VB script after backup:
- Insert %sysdir%\cscript.exe <script.vbs> into the field.
Select the option from the list in the left window. The right-hand window displays
the corresponding input screen. Changes must be confirmed by clicking the
 button.
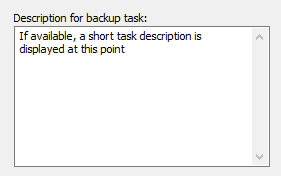

Selecting this option, you can insert multiple lines of description for the backup
task. In the main window, this description is displayed as a tooltip when the
mouse cursor is placed over the task name. The description is also shown in the
start dialog.
Task security
Here, you can protect your backup settings from unauthorized overwrites by
specifying a password that must be entered before saving a task. Simply delete
this password if you wish to cancel the protection. Before changing or deleting
a password, the current password must be entered for corroboration.
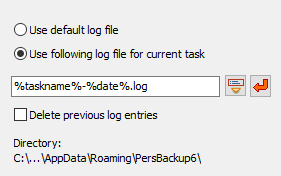
You can select whether the default log file or a specific file is to be used
for the currently-opened task.
- Use default log file: the log will be written to the
default log file used for all tasks (see ..)
- Use following log file for current task:
you can specify any fixed filename and you may specify a name containing placeholders.
On clicking the button with a red arrow, a placeholder for the name of the task,
on clicking the button left next to it placeholders for date and/or time
(refer to ..) or for backup destination will be inserted. When, for example,
the backup task Test.buj is executed and the placeholders included in
the screenshot above on left are used, a new log file (e.g. test-2015-04-01)
will be created on each day. In both cases, if a fixed name or a name with a placeholders
is used, the log will be appended to an existing file when running a backup.
Delete previous log entries: This option is only available if
a particular log file was selected for the task. Before starting the backup,
all existing entries will be deleted.
Location of the log file: At the bottom the currently selected
log directory is displayed for your information. This directory can be selected
in the dialog called from
Preferences ⇒ Directories ...
in the main menu. By default the AppData\Roaming\PersBackup6 directory
of the user is used (see more).
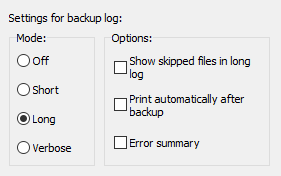
Log settings
You can adjust the log file settings individually (screenshot above on right)
for this backup task (more details).
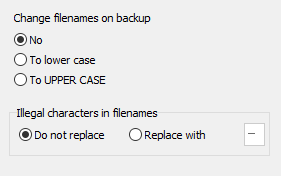
File and directory names can be changed during copying (screenshot above on left):
- Never: Leave all names unchanged
- To lower case: Convert names to lower case
- To UPPER CASE: Convert names to upper case
- Replace illegal characters: Filenames on network resources
created by systems other than Windows may contain illegal characters. Select
this option to replace such characters with an alternative (default: "-")
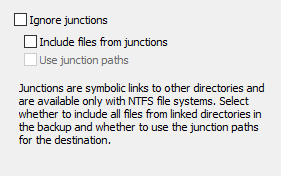
Using the NTFS file system, since Windows Vista it has been possible to insert hard
links (junctions) to other directories into the file system.
To create such a junction, use the console command MKLINK. During backup
there are four ways to take junctions of subdirectories into account. Refer to
the screenshot above on right:
- If Ignore junctions is selected, all junctions found during backup
will be skipped and no information about is saved with the backup.
- If neither this nor the other options are selected,
just the information about the junction will be
saved at destination in the file <Name>.pblink. This file will
be used by the program optionally to recreate the junction on restore.
- If only the option Include files from junctions is selected, a
subdirectory will be created in the current destination directory to hold
all files from the linked directory, hence the junction is replaced by a
subdirectory.
- If you also check Use junction paths (only available for backups into
files and separate directories for drives, not for backups via FTP),
the files in the linked directories will be saved to a path at the destination
that corresponds to the source. The junction itself will be saved at the destination
as the file (<Name>.pblink) that will be used by the program
optionally to recreate the junction on restore.
Note: With junctions, there is the inherent danger of endless
recursions, for example when linking to a higher-level directory. The program
will recognize and ignore such recursions if possible.


The program uses an internal buffer for copying and/or compressing files.
The size of this buffer can be set in multiples of 1 KiB (= 1024 Byte). When using external
drives (e.g. USB) you can speed up the copy process by changing the buffer size
(screenshot above on left).
The default values are 4096 KiB for Windows and 256 KiB for FTP transfers,
but experimentation can be worthwhile.
In addition Windows cache (system transfer buffer) can optionally be disabled.
All files will then be written directly to the storage medium. Using this
option the user may have the impression that file copying is slowed down. But
in fact copying via the cache is no faster because the system is processing
data transfers in the background which is hardly perceptible to the user.
However, immunity from system errors will be increased by writing directly to
the storage medium.
During backup, all file and directory attributes will be copied
by default (more info). However, some NAS systems do not
support the Windows specific file attributes. In this case you can disable this
function.
To prevent the program from hanging during file copying, for example when the
destination is no longer available (as can happen on network connections), timeout
monitoring is implemented. The default setting is 60 s, meaning that the
backup process of the current file will be terminated if copying a block
(see Copy buffer) takes longer than this. You can increase
this time as required (image at top right). To turn timeout
monitoring off, set the time to zero (screenshot above on right).
In addition, you can set the number of timeouts to be allowed after which the
backup will be aborted outright (Default: 5).
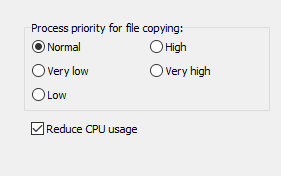
You can adjust the priority of the file copying processes with respect to other
applications (screenshot above on left): if you select "Very low", other running
processes will decelerated
less than with the "Normal" setting. If you select "High",
the file copying processes will be given a higher priority, possibly causing
other applications to run more slowly.
Note: This setting only has an effect if there are
other processes running with high CPU usage.
In addition you can select whether Personal Backup has to reduce its CPU usage to
provide more CPU time for other processes. For maximum copy speed, this
option must be switched off (default setting).
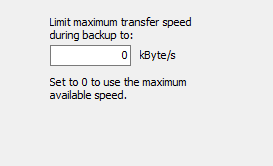
Transfer speed
Sometimes, for example when backing up data via a network connection on a server,
it is expedient to limit the data transmission rate. Other accesses to network
resources are thereby affected less severely. The value can be specified as
maximum transfer speed in kByte/s (screenshot above on right).
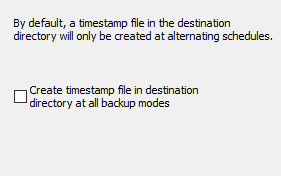
If this option (screenshot above on left) is selected, after every backup a file named
$timestamp will be written to the root directory of the destination.
It contains an information about the start time of the most recent backup.
So looking at this file, the user can recognize when this was performed.
If this option is not selected, the timestamp file will only be created
with alternating schedules and the modes differential or
incremental to recognize if there were multiple backups on the same day.
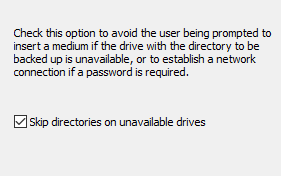
When backing up a directory located on a removable medium or on a network resource,
it can happen that this is unavailable during backup, e.g. if a USB stick is not
plugged in. If the backup was started manually or automatically using one of the modes
Wait for prompt or Wait only on error, the user will prompted to
insert the medium.
Select this option (screenshot above on right) if you wish always to skip backing up such
a directory. In this case only an appropriate note will be added to the log.
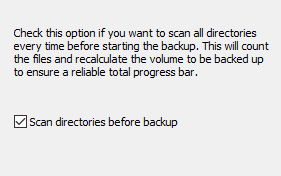

If this option (screenshot above on left) is selected, all directories to be backed up
will be scanned every time before the backup is started. Thereby all selected files
are counted and their volume volume is recalculated. This ensures an absolute
reliable display of the total progress bar during the following backup. To spare
time this option is by default disabled. In this case the progress bar will use
the result from the last preceding backup.
Status display
Before starting a backup, the program will by default send a message to the
Windows system not to go into idle mode and not to switch off the display until
the backup has been finished. Thus, the status display always remains visible
during a backup. By checking this option (screenshot above on right),
Windows will be permitted to switch off the display during longer backups.
You can also select whether errors that occur during the backup are displayed
in addition to the status window in the form of a list.
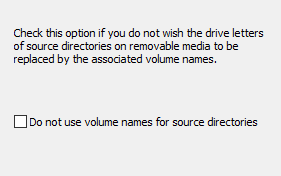
If you want to back up files from a removable drive (e.g. a USB stick) you cannot
be certain that the same drive letter will always be assigned.
To prevent this, the program normally checks the volume name of the storage medium
(see here). If you do not wish the program
to act in this way, you can select this option to force the drive
letters to be used every time. In this way you can configure a
task to backup the files from any storage medium using a given
drive letter, e.g. drive K:, registered by the system on connection.
J. Rathlev, 24222 Schwentinental, Germany, January 2025